Difference between revisions of "HOWTO: Add a new AU to your node for a test crawl"
| Line 59: | Line 59: | ||
== 8. Initiate a request to crawl the newly-added AU == | == 8. Initiate a request to crawl the newly-added AU == | ||
| + | |||
| + | LOCKSS will often begin crawling a new AU relatively soon after it has been added to the daemon's list of AUs; but you can and should use the ''''Start Crawl''' button in the LOCKSS daemon '''Debug Panel''' to help the process speed along. (The label for this button is slightly misleading -- it does not actually force LOCKSS to start the HTTP crawl of the selected AU immediately. But it does boost the crawl right up to the top of the priority queue for pending crawls, so it should guarantee that it starts relatively soon.) | ||
| + | |||
| + | To do this, go to your LOCKSS daemon's administrative interface and select the '''Debug Panel''' from the navigation links on the left. Then, find the drop-down list located just above the '''Start V3 Poll''' and '''Start Crawl''' buttons. Pull down the drop-down and scroll through the list of AUs to find the new one which you have just added: | ||
| + | |||
| + | [[File:Screenshot-adpnadah-debug-panel-au-dropdown.jpg]] | ||
| + | |||
| + | Then, once the AU is selected, mash the '''Start Crawl''' button: | ||
| + | |||
| + | [[File:Screenshot-adpnadah-start-crawl-au-selected.png]] | ||
| + | |||
| + | Then you can verify that the crawl has been put into the queue and set to '''Pending''' by going to '''Daemon Status''' > '''Active Crawls''' | ||
| + | |||
| + | [[File:Screenshot-adpnadah-daemon-status-confirm-crawl.png]] | ||
| + | |||
| + | If it's there, then you can get some coffee, do something else for the next several hours, and wait for the LOCKSS daemon to initiate and complete the test crawl. | ||
== 9. After a while, confirm that the AU has been successfully crawled == | == 9. After a while, confirm that the AU has been successfully crawled == | ||
Latest revision as of 11:57, 8 July 2022
- This HOWTO document is for Technical Policy Committee members and Preservation Node Managers who have been asked to help with the test crawl for a new Archival Unit (AU) before it is published to the LOCKSS network for preservation.
So, you have been informed that a new Archival Unit (AU) is in the process of being prepared for preservation in ADPNet, and you have been asked to add the AU to your LOCKSS Preservation Node for the purpose of performing a 1st or 2nd test crawl.
Here's how you do that:
1. Pick Your Preservation Node and Get the Peer Code
IF your institution operates more than one Preservation Node on the ADPNet network, you'll only need to pick ONE (1) node for the test crawl. (If you do a lot of test crawls, you might designate one of your LOCKSS nodes as a dedicated test server, which you use whenever there is a test crawl to be performed.)
WHETHER OR NOT you have more than one Preservation Node, you'll need to take down the alphanumeric peer code for the server that you will be using in the test crawl. Every preservation node on the ADPNet network has a short alphanumeric code, which we'll call a Peer Code. The preservation nodes currently on the network are:
| Institution | Institution Code | Peer Code | Domain Name |
|---|---|---|---|
| Alabama Department of Archives and History | adah | ADAH | adpnadah.alabama.gov |
| Auburn University | aub | AUB | |
| Birmingham Public Library | bpl | BPL | |
| Louisiana State University | lsu | LSU | lsu-liblockss-vm.lsu.edu |
| University of Alabama (0) | ua | UAT | |
| University of Alabama (1) | ua | UAT1 | |
| University of North Alabama | una | UNA |
Make sure to note the alphanumeric code for your preservation node. (For example, ADAH for the sole preservation node of the Alabama Department of Archives and History.) You'll need it below to prepare your titlesDb URL.
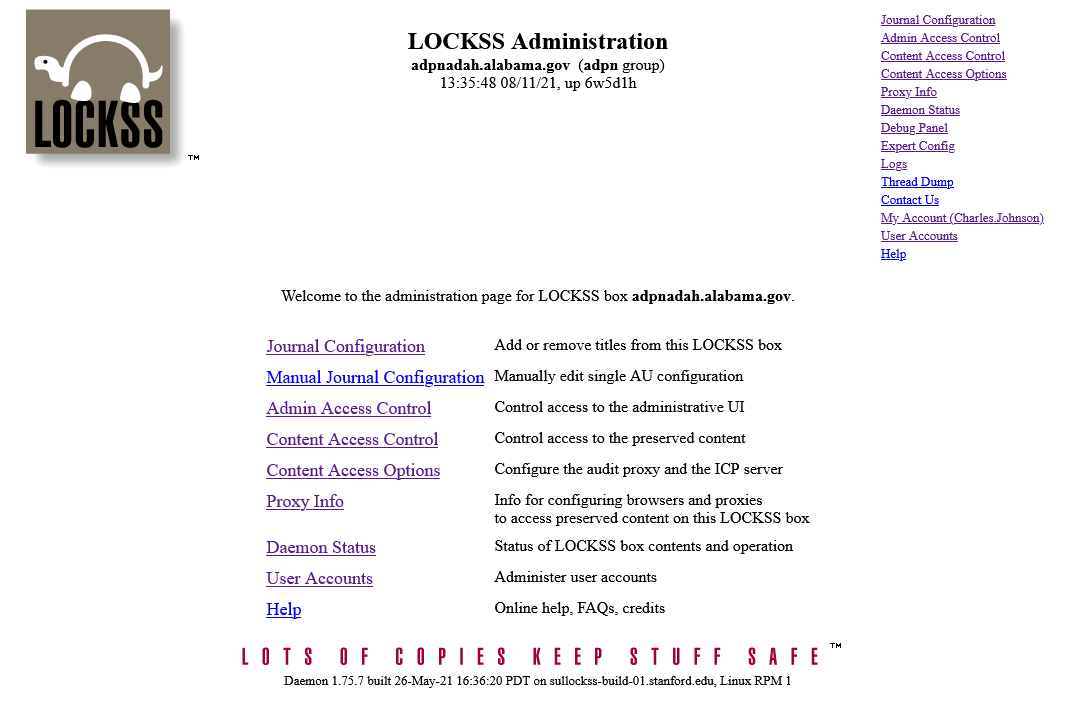
2. Log in to your LOCKSS Administrative Interface
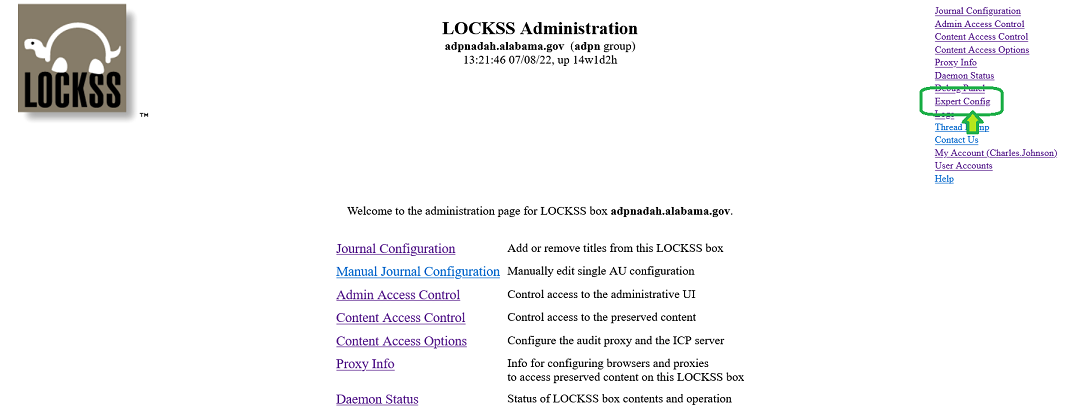
3. Under Expert Config, reset your titleDbs URL to the test feed URL in order to include unpublished AUs
In order to see candidates for test crawls, which have not yet been published to the entire network, you'll need to temporarily change a setting in the LOCKSS admin interface that sets the URL for your LOCKSS daemon's titleDbs XML source.
- You'll need: the Peer Code for your Preservation Node. (See above.)
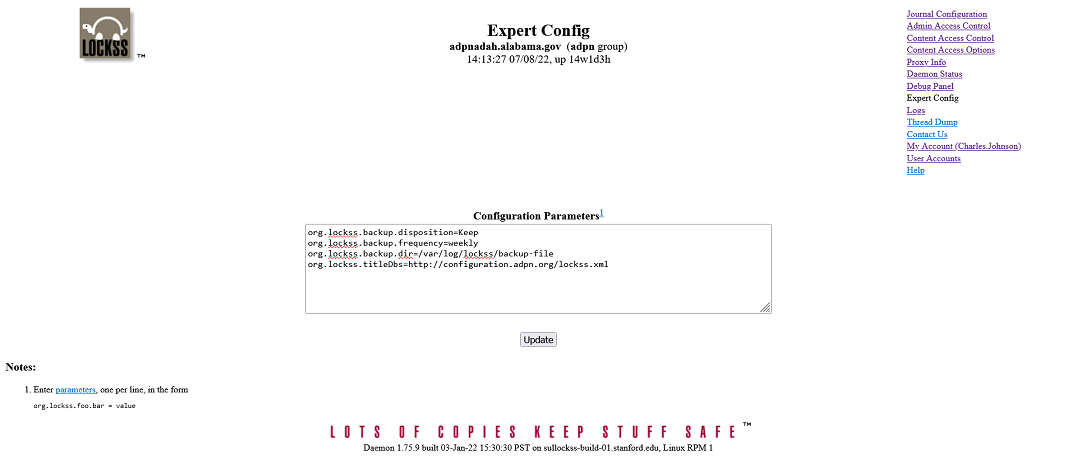
The Expert Config interface provides a simple text editing box with a series of key-value pairs, one on each line (in the format `key=value`):
The setting that you want to change is org.lockss.titleDbs. Normally, it will be set to point to the published lockss.xml file on the props server (http://configuration.adpn.org/lockss.xml).
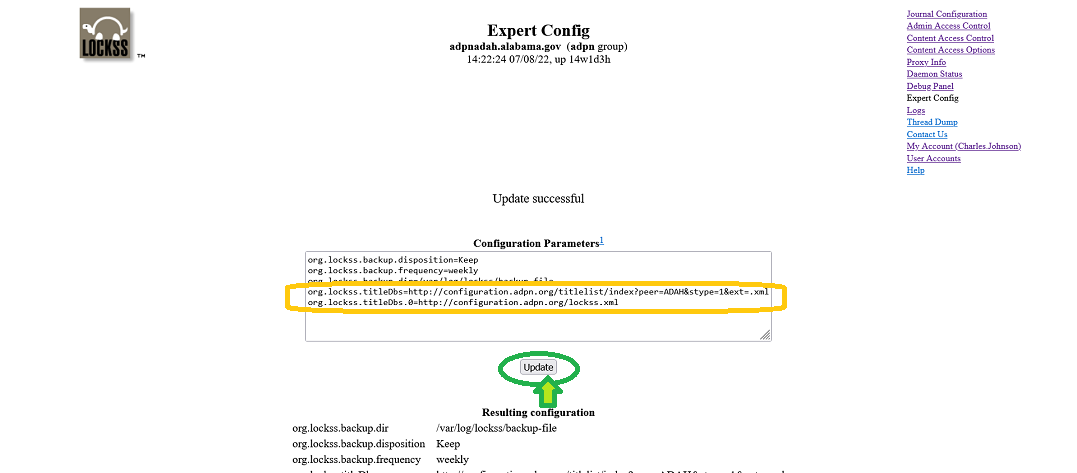
You want to change it to a new URL that dynamically includes AUs accepted for a test crawl, but not yet published to the entire network. The URL you need will use the Peer Code that you noted above. For example, if you are performing a test crawl on the Preservation Node with the code FOO, you would use the URL and setting:
- org.lockss.titleDbs=http://configuration.adpn.org/titlelist/index?peer=FOO&stype=1&ext=.xml
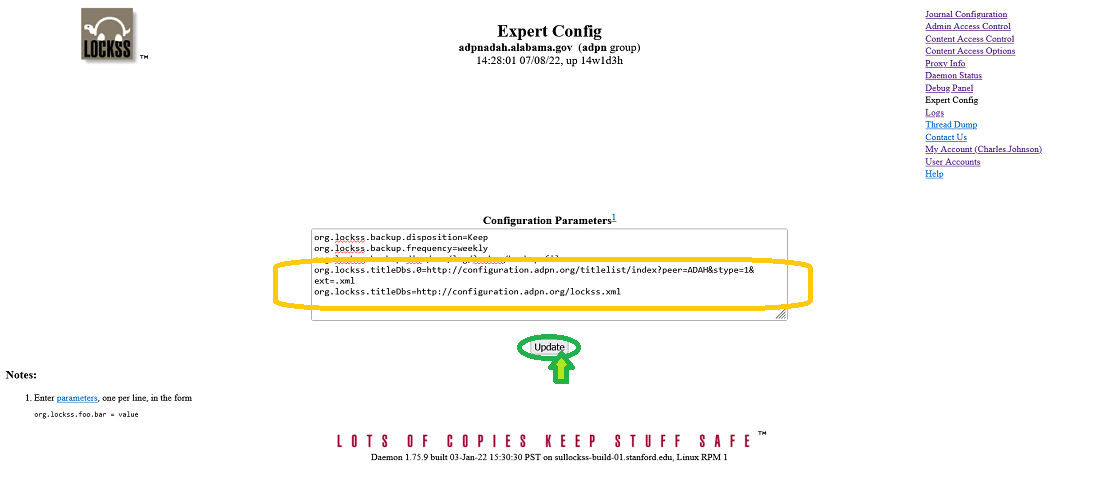
You should also preserve the old value for this setting, so that you can easily revert back to the old setting when you are done performing and confirming the test crawl. To do this, just edit the old line to change the name of the key to an altered name, such as org.lockss.titleDbs.0. Then insert the new line above the old setting. For example, here is what we would use at the Alabama Department of Archives and History (Peer Code ADAH):
Mash the Update button to save your changed settings.
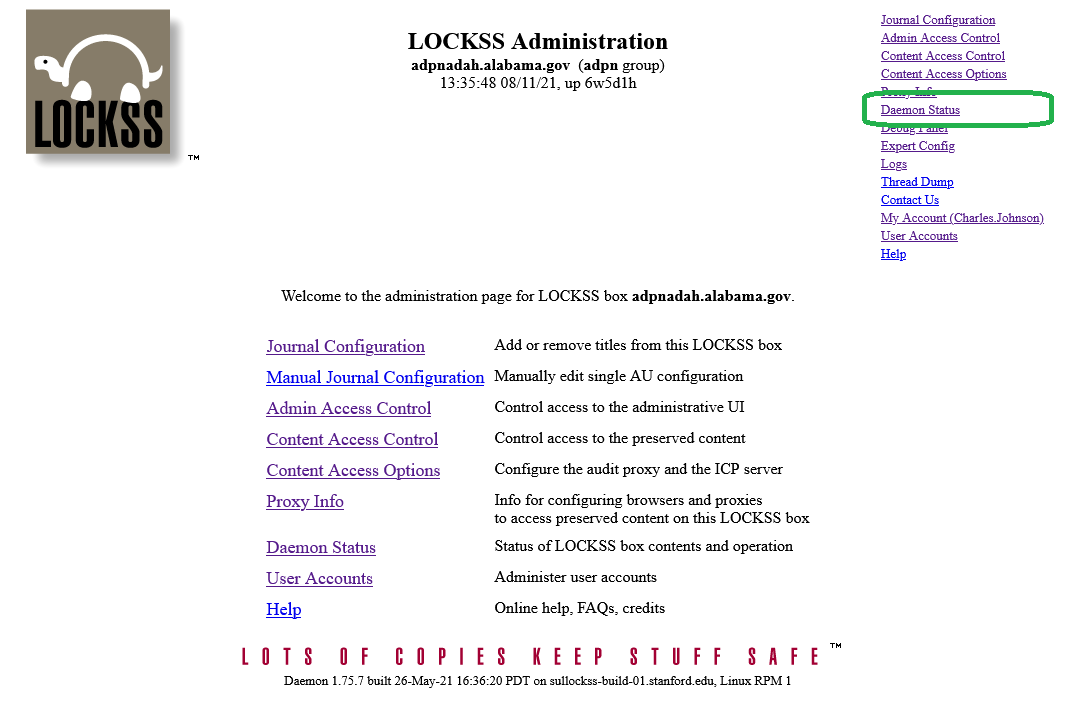
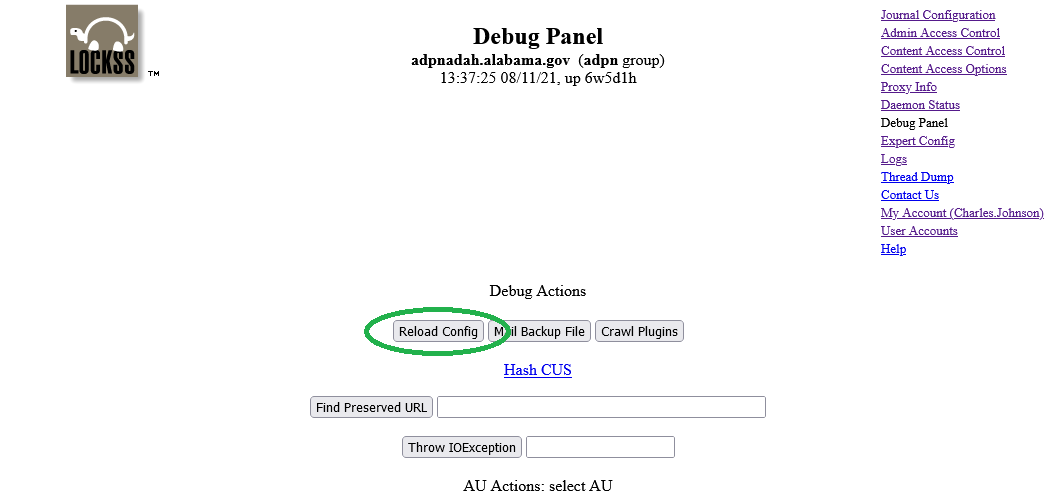
4. Refresh your AU titles feed using Debug Panel > Reload Config
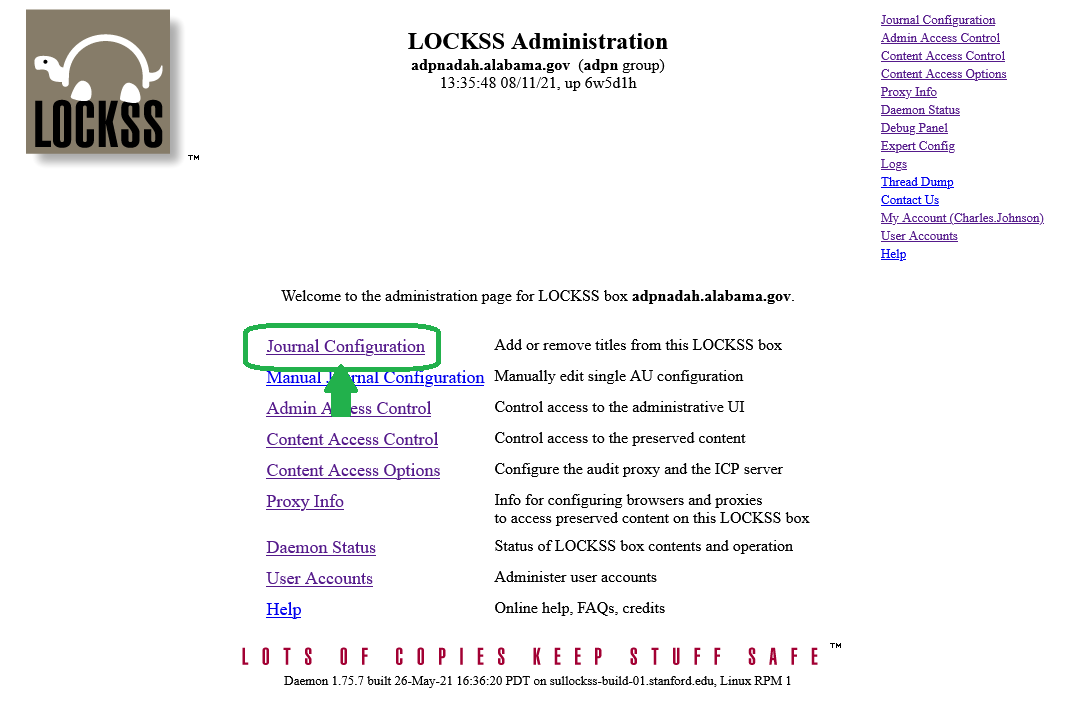
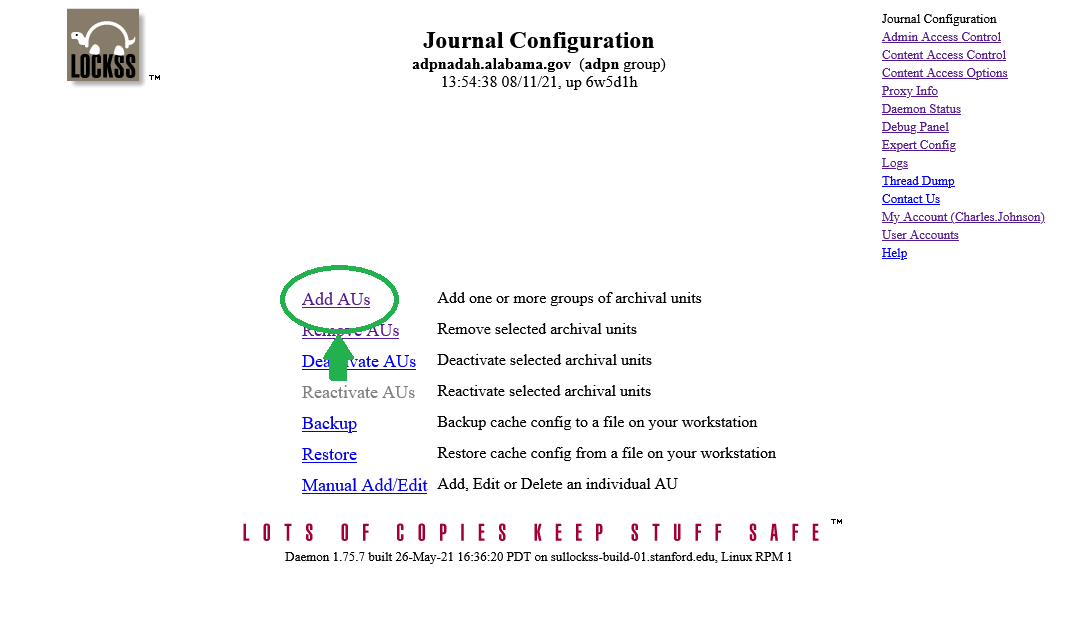
5. Find the new AU under Journal Configuration > Add AUs
6. Select the institution using "Select AUs"
7. Select the new AU and mash "Add Selected AUs"
8. Initiate a request to crawl the newly-added AU
LOCKSS will often begin crawling a new AU relatively soon after it has been added to the daemon's list of AUs; but you can and should use the 'Start Crawl button in the LOCKSS daemon Debug Panel to help the process speed along. (The label for this button is slightly misleading -- it does not actually force LOCKSS to start the HTTP crawl of the selected AU immediately. But it does boost the crawl right up to the top of the priority queue for pending crawls, so it should guarantee that it starts relatively soon.)
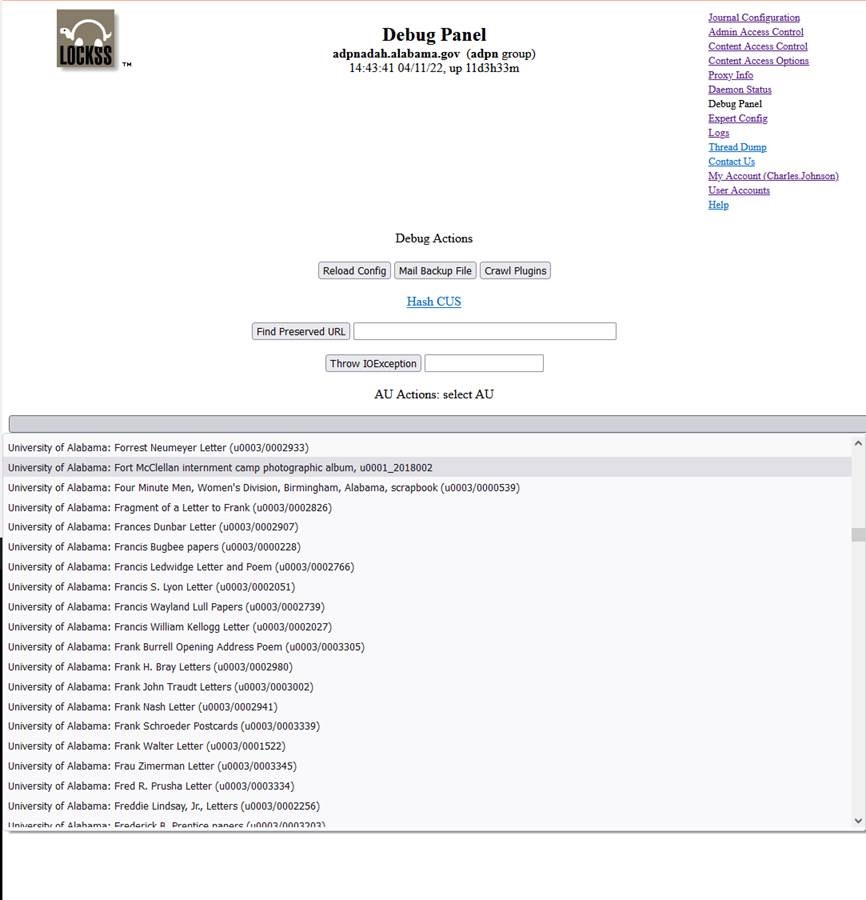
To do this, go to your LOCKSS daemon's administrative interface and select the Debug Panel from the navigation links on the left. Then, find the drop-down list located just above the Start V3 Poll and Start Crawl buttons. Pull down the drop-down and scroll through the list of AUs to find the new one which you have just added:
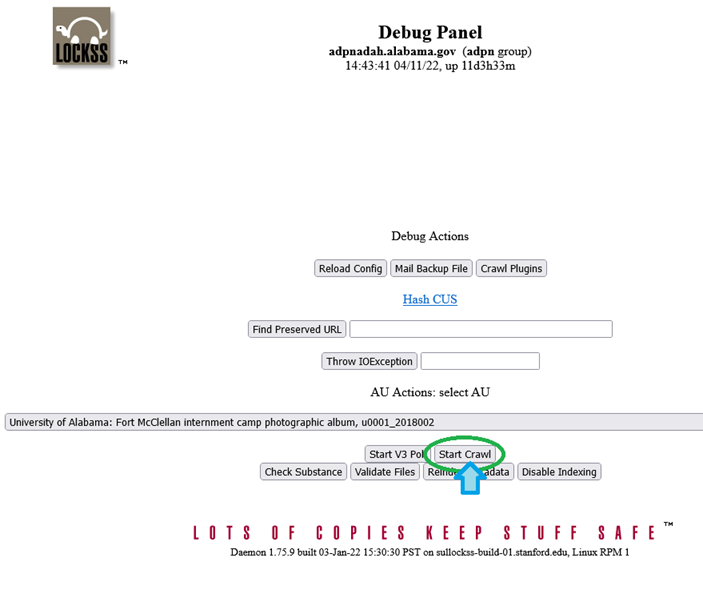
Then, once the AU is selected, mash the Start Crawl button:
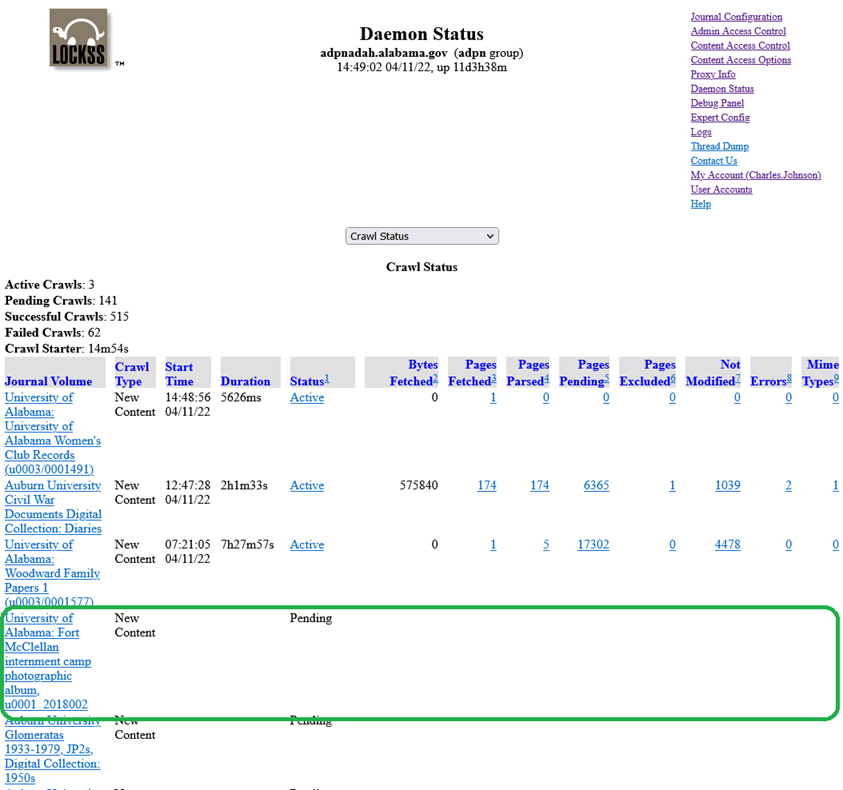
Then you can verify that the crawl has been put into the queue and set to Pending by going to Daemon Status > Active Crawls
If it's there, then you can get some coffee, do something else for the next several hours, and wait for the LOCKSS daemon to initiate and complete the test crawl.
9. After a while, confirm that the AU has been successfully crawled
10. In Expert Config, reset your titlesDb URL to its original value
When you have COMPLETED the test crawl and CONFIRMED its success, you will usually want to reset your Expert Config settings so that your LOCKSS daemon will pull AUs from the network-standard published lockss.xml file, instead of from the test feed. To do this, reset the value of your org.lockss.titleDbs setting to the original URL:
